How to Install Rails 6 on Windows
⚠ UPDATE from 2021 ⚠
Installing Rails on Windows 10 got a lot easier. Follow my updated guide here.
As a coach for RailsGirls I had to assist in installing Rails on Windows recently. There’s an official guide, but even though it looks easy, it turns out to be a bit cumbersome to fully set up Rails and my goal was to make the process as easy and as fast as possible, without relying on RailsInstaller.
So what’ the goal here?
- Install Ruby with RubyInstaller, which is up to date (unlike RailsInstaller)
- Install Rails 6.0, which is the latest version at the time of this writing
- Do not rely on Windows Subsystem for Linux (WSL) and bash, but use native Windows tools and PowerShell
So let’s start!
Step 0: Open the Windows PowerShell
This is the place where we enter all the following commands and it looks like this:
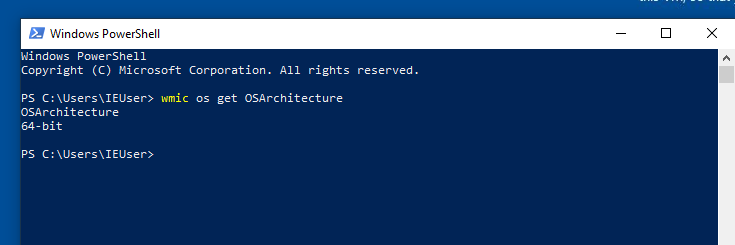
You can enter the command wmic os get OSArchitecture and hit Enter, as seen in the screenshot:
PS C:\Users\YourName> wmic os get OSArchitecture
If this gives you 64-bit, you should download The RubyInstaller that ends in x64. If it says 32-bit (which is unlikely), you should download RubyInstaller that ends in x86. If unsure, use 64 bit (x64).
Step 1: Download RubyInstaller, NodeJS and Yarn
Create a new folder in your home directory and call it “railsgirls”. You could also give it a different name, but we will use this folder name from now on.
Then, download RubyInstaller, NodeJS and Yarn into the railsgirls folder. You could get these packages by hand and rename them to rubyinstaller.exe, nodejs.msi and yarn.msi.
Optional: Instead of downloading the files by hand, you can run these commands (most probably only working in Windows 10):
wget https://github.com/oneclick/rubyinstaller2/releases/download/RubyInstaller-2.6.5-1/rubyinstaller-devkit-2.6.5-1-x64.exe -o rubyinstaller.exe
wget https://nodejs.org/dist/v12.13.0/node-v12.13.0-x64.msi -o nodejs.msi
wget https://yarnpkg.com/latest.msi -o yarn.msi
So now you have a railsgirls folder with these 3 files in them. Navigate to that folder in your PowerShell:
PS C:\Users\YourName> cd C:\Users\YourName\railsgirls
To not have to type the full folder path, you can enter cd (don’t forget the space after cd!) and then drag and drop the folder from Explorer address bar as seen here:
Step 2: Create installer script files
Now, go to the Explorer folder (“railsgirls”) and create a new text file with a right-click > New > Text Document.
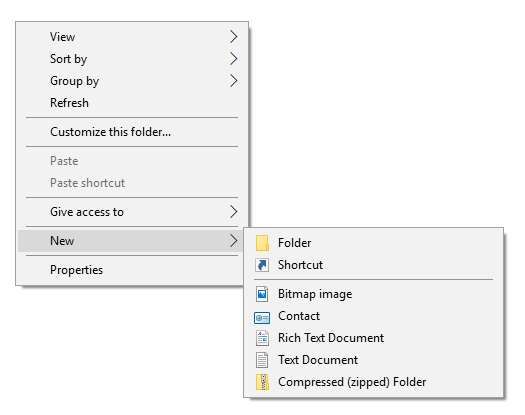
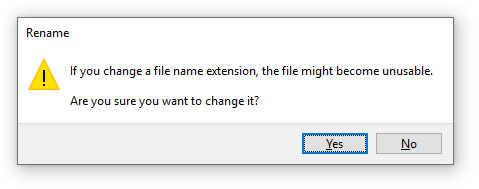
Rename the file install1.bat and make sure that you remove the .txt file extension from the suggested name.
Click yes when the following warning appears:
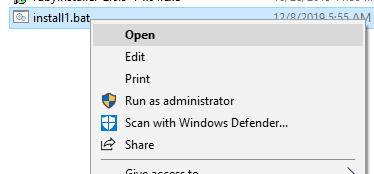
Right-click on this new install1.bat file and select Edit:
You will now see and empty Notepad editor. Paste the following text into this window:
REM install1.bat
@echo off
If not exist rubyinstaller.exe (
    echo ###########################################################################
    echo #
    echo # Could not find rubyinstaller.exe in this folder
    echo # Get the latest version of Ruby+Devkit from https://rubyinstaller.org/ and
    echo # rename the file to rubyinstaller.exe and put it into this folder.
    echo
    echo ###########################################################################
    exit
)
If not exist nodejs.msi (
    echo ###########################################################################
    echo #
    echo # Could not find nodejs.msi in this folder.
    echo # Download NodeJS LTS from https://nodejs.org/en/ and
    echo # rename the file to nodejs.msi and put it into this folder.
    echo #
    echo ###########################################################################
    exit
)
If not exist yarn.msi (
    echo ###########################################################################
    echo #
    echo # Could not find yarn.msi in this folder.
    echo # Download Yarn stable from https://yarnpkg.com/ and
    echo # rename the file to yarn.msi and put it into this folder.
    echo #
    echo ###########################################################################
    exit
)
echo All files are present, continuing with installation...
echo Installing RubyInstaller...
.\rubyinstaller.exe /silent && ^
echo Installing NodeJS...  && ^
.\nodejs.msi /passive && ^
echo Installing Yarn...  && ^
.\yarn.msi /passive && ^
echo . && ^
echo . && ^
echo . && ^
echo ######################################### && ^
echo # NOW RUN INSTALL2.BAT                  # && ^
echo ######################################### && ^
pause
and now save this file. It should look like this:
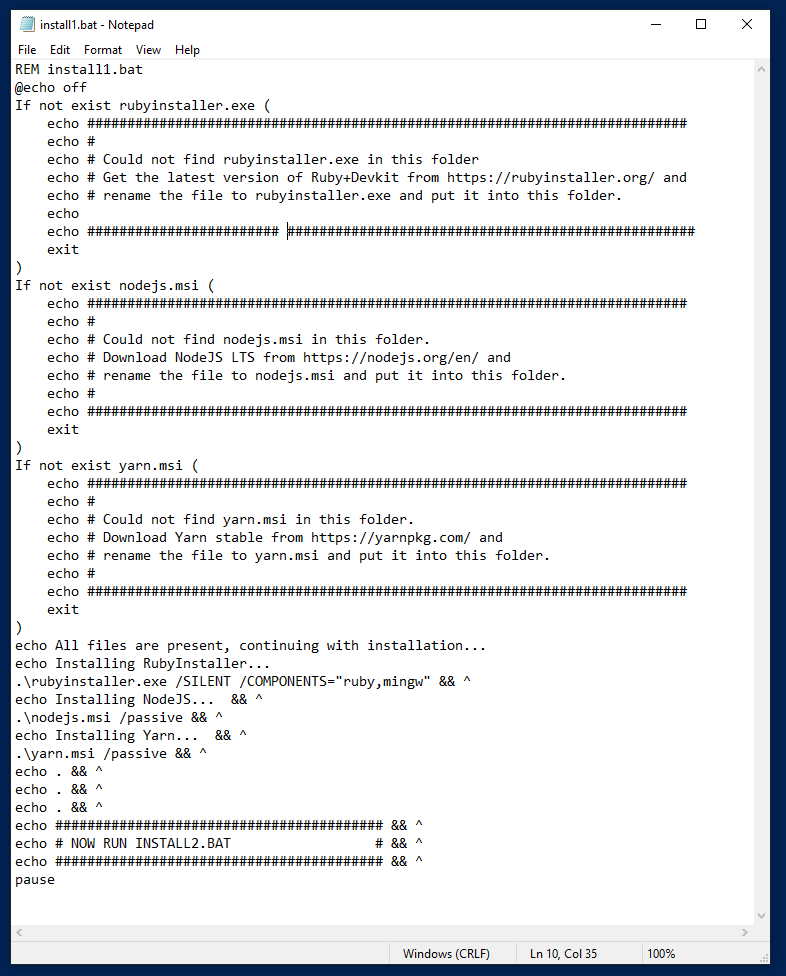
After you saved this file, you can close Notepad.
Create a new file called install2.bat exactly the same way (rename, remove .txt extension), with the following content:
REM install2.bat
@echo off
echo Installing MinGW...  && ^
ridk install 3 && ^
echo Installing Bundler...  && ^
gem install bundler --no-document && ^
echo Installing SQLite...  && ^
gem install sqlite3 --platform=ruby --no-document && ^
echo Installing Rails...  && ^
gem install rails --no-document && ^
echo Installing Setting up new rails app...  && ^
rails new myapp && ^
echo . && ^
echo . && ^
echo . && ^
echo ######################################### && ^
echo # ALL DONE.                             # && ^
echo ######################################### && ^
pause
Also save this file and close Notepad.
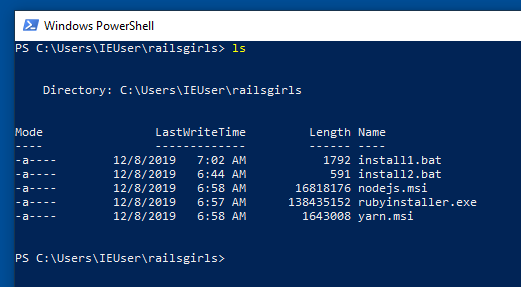
Now back to your PowerShell. Type in ls and hit Enter:
PS C:\Users\YourName\railsgirls> ls
You should see your two bat files and the three installers:
Step 3: Run the installer scripts
In your PowerShell, first, run .\install1.bat:
PS C:\Users\YourName\railsgirls> .\install1.bat
This installs RubyInstaller, NodeJS and Yarn. You will see a few installer windows, they might prompt you for permission, other than that they should run by themselves.
At the end you will see:
#########################################
# NOW RUN INSTALL2.BAT                  #
#########################################
Press any key to continue . . .
Now, close this window and open a new PowerShell. Navigate to your railsgirls folder again (with cd, as above).
PS C:\Users\YourName> cd C:\Users\YourName\railsgirls
Now run the .\install2.bat script:
PS C:\Users\YourName\railsgirls> .\install2.bat
And the end you should see:
Webpacker successfully installed 🎉 🍰
.
.
.
#########################################
# ALL DONE.                             #
#########################################
Press any key to continue . . .
Nice! Now you installed Rails with all its dependencies, so you’re done. Congratulations!
Step 4: OPTIONAL: Run your Rails application
The install2.bat script created a new folder called myapp with a Rails application in your railsgirls folder.
After you hit enter to exit the installer script, you can navigate to that Rails app with:
PS C:\Users\YourName\railsgirls> cd myapp
And inside that folder run:
PS C:\Users\YourName\railsgirls\myapp> bundle exec rails server
This might take 10 to 15 seconds, and should look like this:
PS C:\Users\YourName\railsgirls\myapp> bundle exec rails server
=> Booting Puma
=> Rails 6.0.1 application starting in development
=> Run `rails server --help` for more startup options
*** SIGUSR2 not implemented, signal based restart unavailable!
*** SIGUSR1 not implemented, signal based restart unavailable!
*** SIGHUP not implemented, signal based logs reopening unavailable!
Puma starting in single mode...
* Version 4.3.1 (ruby 2.6.5-p114), codename: Mysterious Traveller
* Min threads: 5, max threads: 5
* Environment: development
* Listening on tcp://[::1]:3000
* Listening on tcp://127.0.0.1:3000
Use Ctrl-C to stop
Go to your browser and enter: http://localhost:3000
and you should see this:
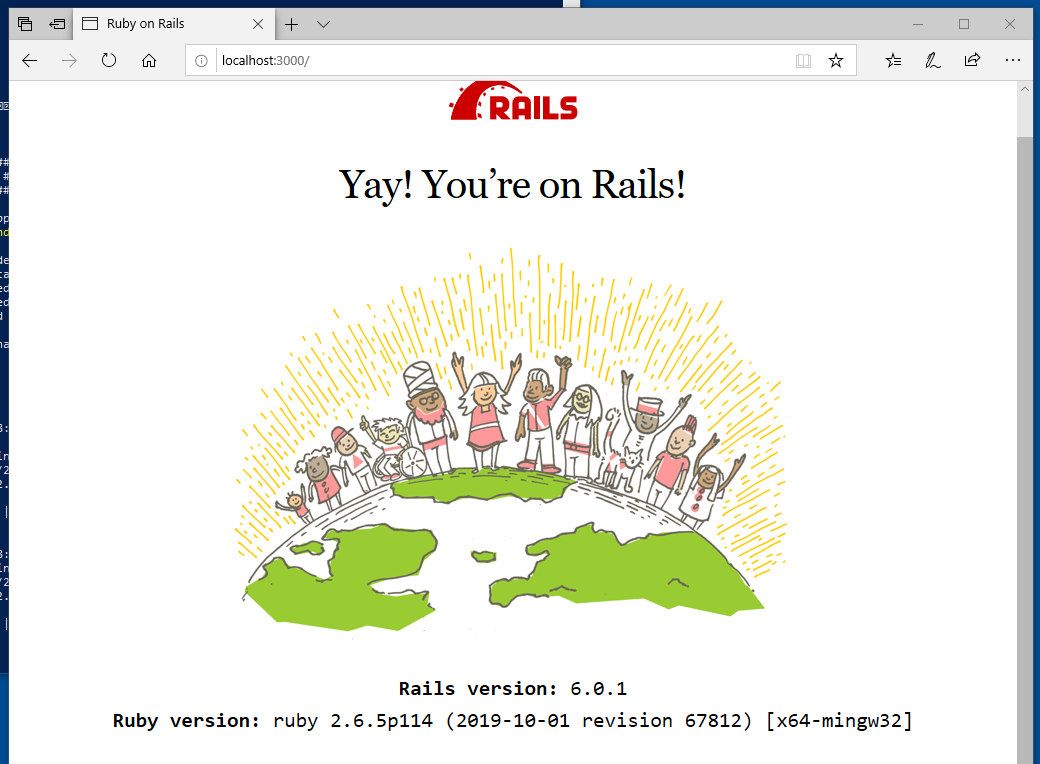
And that’s it!
If you found this installation guide helpful, share it with others. If you have any feedback, get in touch with me on Twitter.
Thanks!